
Blog
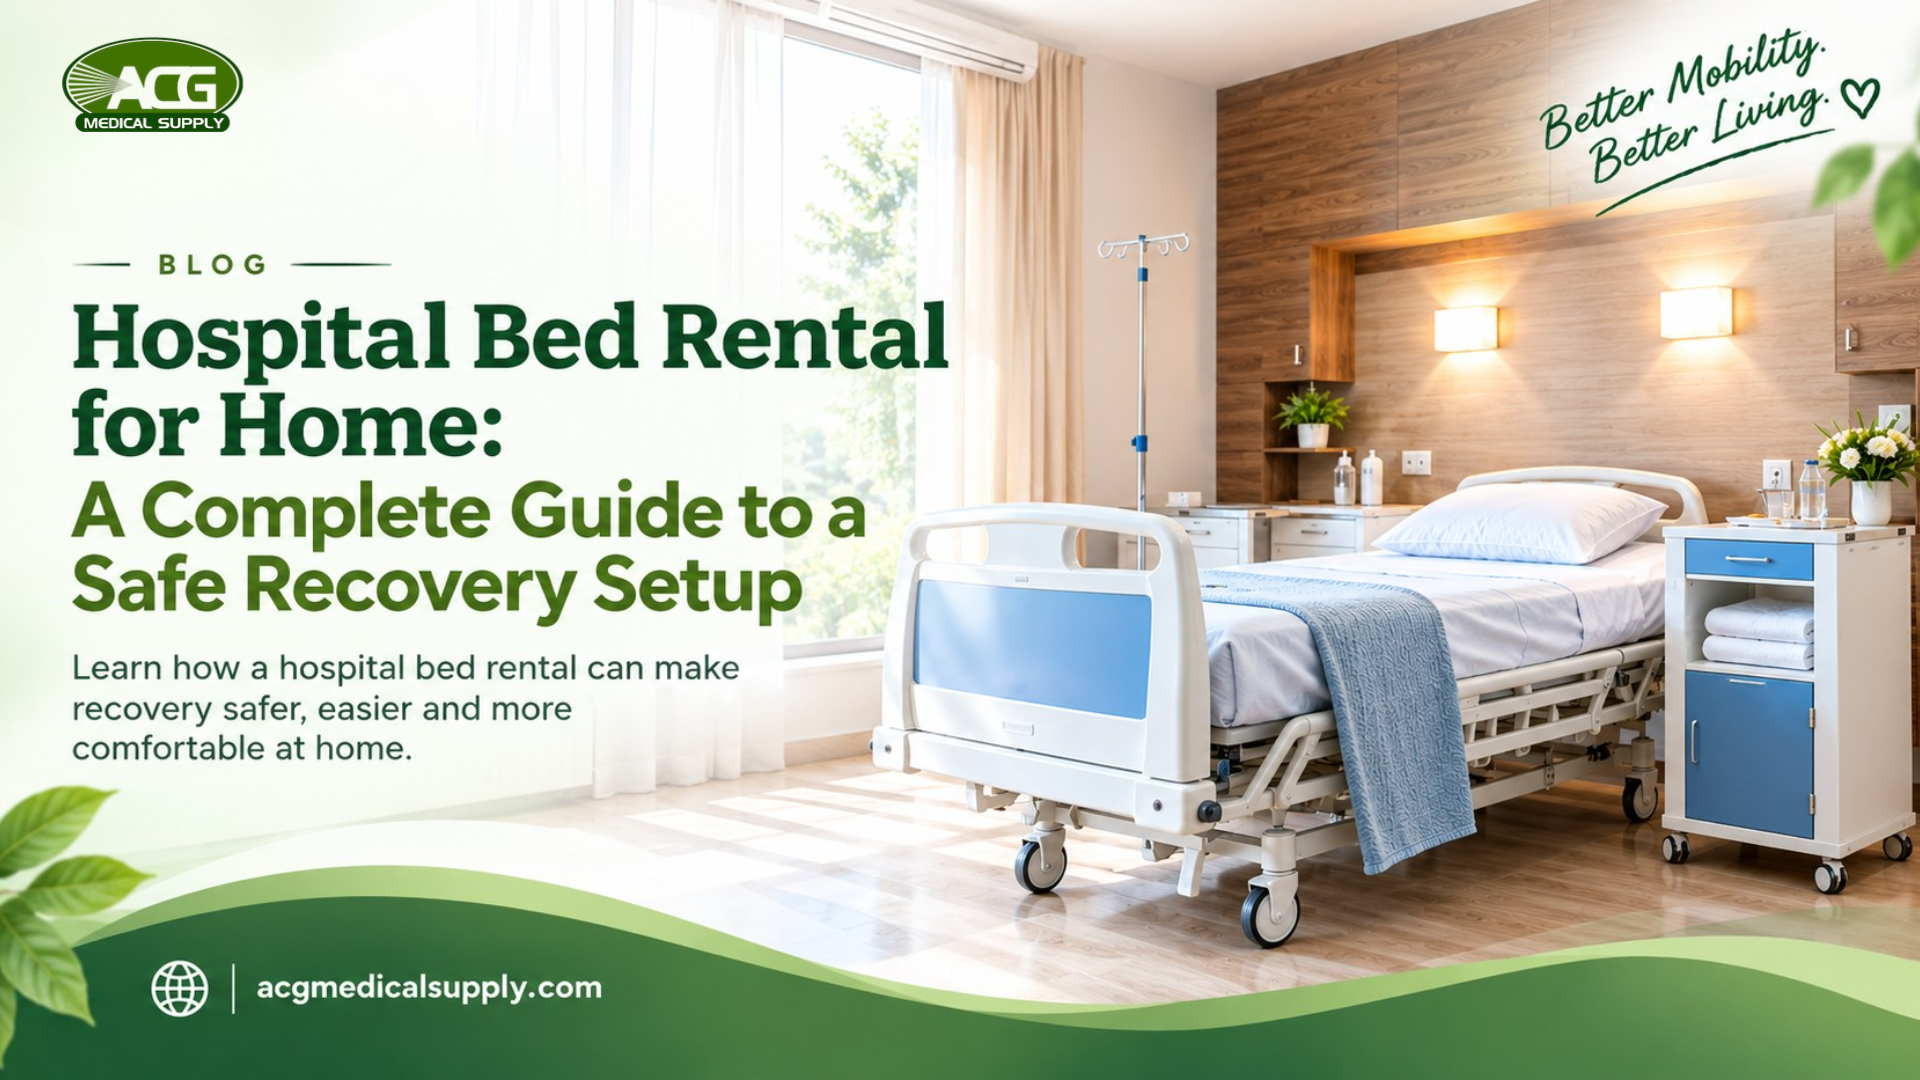
Bringing a loved one home after a hospital stay feels good, but there’s often a long list of things to sort out before they’re settled in. Even the bed can become an issue. A regular one might be too low, difficult to get in and out of, or uncomfortable for someone recovering from surgery or dealing with limited mobility.
A home hospital bed setup can make things easier for the person recovering and the family member helping with their care. Along with the bed itself, you’ll need to think about the room, mattress, controls, and a few basic safety details.
Figuring Out If a Hospital Bed Rental Makes Sense
Buying a hospital bed is a big expense when you only need it for a few weeks. Once recovery is over, there’s also the question of what to do with it. A hospital bed rental for home use avoids that problem. The bed arrives when you need it and goes back when you’re done with it.
Renting can be useful after surgery, an injury, or a change in mobility that makes getting in and out of a regular bed difficult. ACG Medical Supply’s Basic Recovery Package costs $350 for 1 to 30 days. That price includes delivery, setup, a safety inspection, and pickup at the end of the rental. For a short-term hospital bed rental, knowing the cost upfront makes budgeting simpler. Longer rentals are billed monthly.
Before booking a hospital bed rental, ask what’s included. Delivery and setup might be covered, but mattress options and instructions can vary between providers.
Why an adjustable hospital bed for home helps
After surgery or when movement is limited, even finding a comfortable sleeping position can be a struggle. An adjustable hospital bed for home lets you raise the head, bend the knee section, or change the bed’s height, depending on the model. That can make sitting up for meals, getting into bed, and helping someone with daily care less awkward.
The right settings depend on the person’s condition and the instructions they received at discharge. If you’re not sure how the bed should be positioned, check with their healthcare team before making adjustments.
Measure the room and check standard hospital bed dimensions
Grab a tape measure before delivery gets booked. Hospital beds need more room than expected, mostly because a caregiver needs access to at least one side. Standard hospital bed dimensions differ between models, so it’s worth checking the exact bed being delivered. The bed in the Basic Recovery Package measures up like this:
| Feature | Basic Recovery Package |
| Price | $350 for 1 to 30 days |
| Sleeping surface | 80 inches long by 36 inches wide |
| Overall dimensions | 86 inches long by 36 inches wide |
| Adjustable deck height | 18 to 23 inches |
| Weight capacity | 450 lb |
| Mattress | New 6-inch therapeutic foam |
| Controls | Hand pendant |
| Adjustments | Electric head, knee and bed height |
Clear the route from the front door to the room, measure doorways and tight turns, pick up loose rugs, and leave space for a walker or wheelchair, always.
Home hospital bed safety starts with small details
Home hospital bed safety starts with the frame. Lock the casters once the bed is in place, make sure the mattress fits the frame, and keep the bed low when the person is resting or about to stand. Keep the hand control within reach, clear the clutter, and check the cord now and then. Damaged equipment gets reported for repair, never fixed at home.
Side rails deserve extra thought. They give a handhold for rolling over, but they don’t stop falls on their own. The US Food and Drug Administration has warned that people can get trapped between a rail and the mattress, or hurt climbing over one. Rails should suit the individual and match the bed and mattress.
Learning how to operate a hospital bed
The remote looks simple until you press a button and it moves the wrong end of the bed. Learning how to operate a hospital bed takes a few minutes, so do it while the delivery technician is still in the room. Press every button once with the patient lying down. Find out how to stop the bed if one sticks, and keep hands, feet, and bedding away from the moving sections. If the patient has weak hands or memory trouble, a caregiver should run the controls.
Finding the right hospital bed positioning
There’s no one setting that suits everybody. Hospital bed positioning depends on the person’s condition and the discharge notes, so the healthcare team has the final say. Raising the head tends to help at meals. Long days in bed also call for position changes and regular skin checks, since pressure builds up where the body stays put. Redness that won’t fade should go to the nurse.
When a full electric hospital bed rental makes sense
Turning a hand crank several times a day can get tiring, especially when a caregiver is already helping with other tasks. A full electric hospital bed rental lets you adjust the bed using a remote, which can be useful when the patient needs to change positions often for meals, medication, or rest.
Electric models usually cost more than manual beds, so consider whether the extra convenience is worth it. Patients who can use the remote safely may be able to adjust their own position. Getting out of bed is another matter, though. For transfers to a wheelchair, follow the technique taught by the rehab team, including locking the brakes and moving the footrests aside. If the patient can’t bear weight, a patient lift or help from another caregiver may be necessary.
Accessories that make daily life easier
Most of a day in bed happens at arm’s length, which is where an overbed table for hospital bed use earns its place. It rolls over the lap for meals and a phone. Pick a sturdy one that adjusts in height, and nudge it aside before any transfer.
A walker or bedside commode may be worth having too, depending on the patient and how far away the bathroom is. The care team can say which. Leave a clear patch of floor either way, since a crowded bedside gets in everyone’s way.
What the Basic Recovery Package includes
The package covers a full-electric homestyle bed, a new 6-inch therapeutic foam mattress, one set of half rails, delivery and setup, an in-home safety inspection, operating instructions, and pickup at the end. A walker and bedside commode can be added for $100, and the family keeps them.
A recovery room doesn’t need to fill up with equipment. A well-measured space and a caregiver who knows the controls cover most of it, and the package from ACG Medical Supply takes care of the delivery, setup, and pickup.
Frequently asked questions
Only one that fits the frame and rails, as the manufacturer specifies.
Rentals are direct pay, and an itemized receipt is available for reimbursement.
No, it isn’t part of the package.
Yes, the $350 rate covers 1 to 30 days.
No, delivery runs on weekdays.
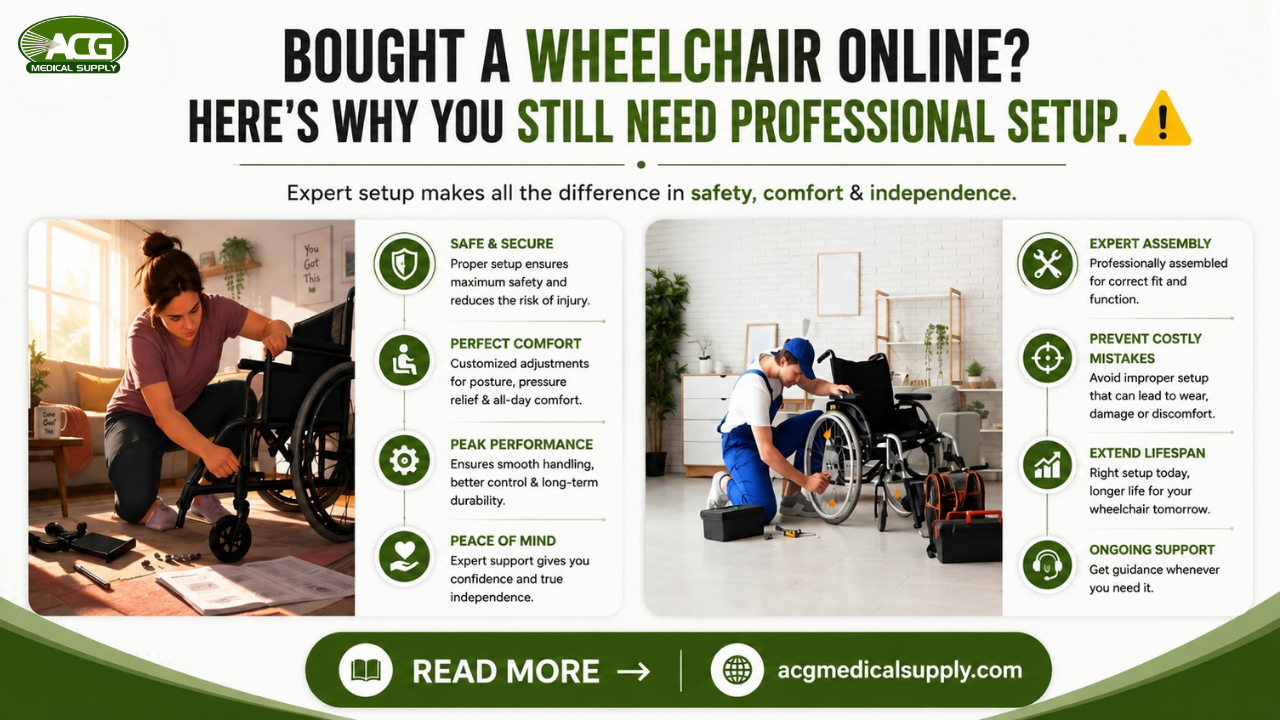
A wheelchair shows up in a box. Wheels, frame, footrests, a plastic bag of bolts, and a manual that was clearly translated by someone who has never sat in one. Somebody unpacks it, clicks the pieces together, and calls it done. And that’s where the trouble really starts.
Because buying online is easy, it barely takes fifteen minutes, a credit card, and a chair arrives at the door two days later. What doesn’t arrive with it is the part that matters: making sure the chair fits the person using it. A wheelchair isn’t a bookshelf. If you assemble it wrong or skip the adjustments entirely, you’re not dealing with a wobbly shelf; you’re dealing with discomfort, poor positioning, or equipment that isn’t as safe or easy to use as it should be.
This is the piece of information that you won’t find in the product description. Here’s what a proper wheelchair fitting actually involves, and why skipping it costs more than it saves.
What “Setup” actually means (hint: it’s not just snapping parts together)
Most online listings show a smiling model in a chair that looks effortless. What they don’t show is the twenty-minute process of checking that the frame, wheels, brakes, footrests, and other components are assembled and secured correctly. A wheelchair assembly service covers all of that. It’s mechanical work, and mechanical work done wrong doesn’t announce itself right away. It may not become obvious until the chair is used regularly, perhaps when a brake starts slipping on a ramp, or a component loosens.
Assembly is step one. It’s the easy part, honestly. The harder part, the part people never think about until something feels off, is making the chair fit the person sitting in it.
Fit is not the same thing as “it rolls”
A wheelchair can be assembled properly, the brakes can work, and the wheels can roll smoothly, but that does not mean it fits the person using it. Seat height, backrest angle, armrest position, and footrest depth all change the way someone sits in the chair. When those measurements are off, an hour of sitting can leave the shoulders, back, or hips sore.
That is where professional wheelchair fitting comes in. A trained technician looks at the person as well as the chair and adjusts the equipment accordingly. Someone who has limited upper-body strength may need the wheels positioned differently from someone who propels the chair independently. A person recovering from surgery may need a different seat depth from someone with a long-term mobility condition. Those are things you cannot work out just by looking at the specifications on the box.
An uncomfortable fit can also cause problems over time. Poor positioning may contribute to pressure on certain areas of the body, poor posture, and difficulty with everyday activities. These issues usually build slowly rather than showing up all at once, so it is easy to ignore them until they start getting in the way of daily life.
When professional wheelchair setup is especially useful
Not every wheelchair purchase needs the same level of support. A simple manual chair may have fewer components to deal with, while a more advanced model can involve several adjustments and safety checks. The user’s situation matters, too.
Professional setup can be particularly helpful when:
- The wheelchair has several adjustable or removable components.
- The user is new to wheelchair use and needs guidance.
- A caregiver or family member will help operate or maintain the chair.
- The wheelchair will be used in a home with tight spaces, steps, rugs, or narrow doorways.
- The chair feels uncomfortable or difficult to manoeuvre after assembly.
- The buyer is unsure whether the wheelchair has been assembled correctly.
There is also something reassuring about having an experienced professional look over the chair before it becomes part of the daily routine. Small setup issues are easier to address at the beginning than after they have turned into ongoing frustrations.
For anyone buying a wheelchair online, professional assistance does not replace the convenience of online shopping. It simply adds a practical layer of support between opening the box and confidently using the chair every day.
What a real wheelchair setup service looks like
The setup process isn’t a rushed afterthought tacked onto a sale. It’s a scheduled in-home visit focused on getting things right the first time. Technicians typically arrive within 48 to 72 hours of booking, and a visit runs about 90 minutes.
Here’s what’s actually included in a flat-rate wheelchair setup service:
- Full unboxing and assembly, done the first time correctly
- A professional wheelchair setup tailored to the user’s body, including seat height, backrest angle, footrest depth, and armrest position
- Testing of brakes, wheels, and, for powered chairs, battery and electrical function
- A 15-point home safety check to flag hazards such as narrow doorways or loose rugs.
- Hands-on training for the user and any caregivers involved
- Full removal of boxes and packaging before the technician leaves
And this applies whether the chair came from a local supplier, an online retailer, or a marketplace site. Bought it online during a late-night sale? That’s fine. A professional wheelchair installation service focuses on getting the equipment properly assembled, adjusted, and ready for everyday use, regardless of where it was purchased.
Signs your chair needs a second look
Some problems show up immediately while others take a while. If any of these sound familiar, it’s time to book a wheelchair fitting service rather than just living with it:
| Symptom | What It Usually Means |
| Red or sore skin after sitting | Seat cushion or positioning isn’t distributing weight correctly |
| Shoulder or wrist pain while pushing | Wheel or armrest height is off for the user’s arm length |
| Chair drifts to one side | Uneven tire pressure, wheel alignment, or another mechanical issue may need checking. |
| Brakes feel loose or don’t fully lock | Assembly, adjustment, or brake alignment may need checking. |
| Feet slide off the footrests | Footrest depth or angle needs a wheelchair adjustment |
| Slouching or leaning after short periods | Backrest angle or seat depth doesn’t match the user’s build |
The real cost of skipping professional help
DIY assembly can seem like the obvious way to save money. But when the chair does not feel right, the savings can disappear pretty quickly. You might end up trying different cushions, wedges, or replacement parts just to make it comfortable. And if something was put together or adjusted incorrectly, that can create problems that should have been caught earlier.
A wheelchair setup appointment takes some of that guesswork out of the process. A technician can look at the chair with the person actually sitting in it, spot what needs changing, and make those adjustments on the spot. When a family is already dealing with recovery, changing mobility needs, or caring for an older parent, having someone handle this part can make things a little easier.
Conclsuion
Buying mobility equipment online can be convenient. It also means the wheelchair arrives without anyone there to check how it fits the person who will be using it.
Once it is delivered, the seat height, footrests, brakes, and other adjustable parts still need to be set up properly. The space around the chair matters too. Doorways, furniture, flooring, and other things in the home can affect how easily the wheelchair is used.
ACG Medical Supply offers in-home setup and fitting support after an online purchase, including equipment bought from other retailers. Having a technician come to the home means the chair can be checked and adjusted in the same place where it will be used.
A new wheelchair does not need more features to be useful… it needs to be put together properly, adjusted to the person using it, and ready for everyday life.
FAQs
Not in every case, but professional help can be useful when the chair needs assembly, fitting, adjustments, or hands-on guidance.
A wheelchair fitting service involves adjusting the parts of the wheelchair that can be changed so they suit the user’s size, position, and needs.
It covers putting the wheelchair together correctly and checking that the components are secure and working as they should.
Visits are typically scheduled within 48 to 72 hours of booking.
That’s why patient lifts exist. Some people call them transfer lifts; some call them mechanical lift devices. It doesn’t really matter what you call them; they all do the same basic job: get a person from one place to another without anyone getting hurt in the process.
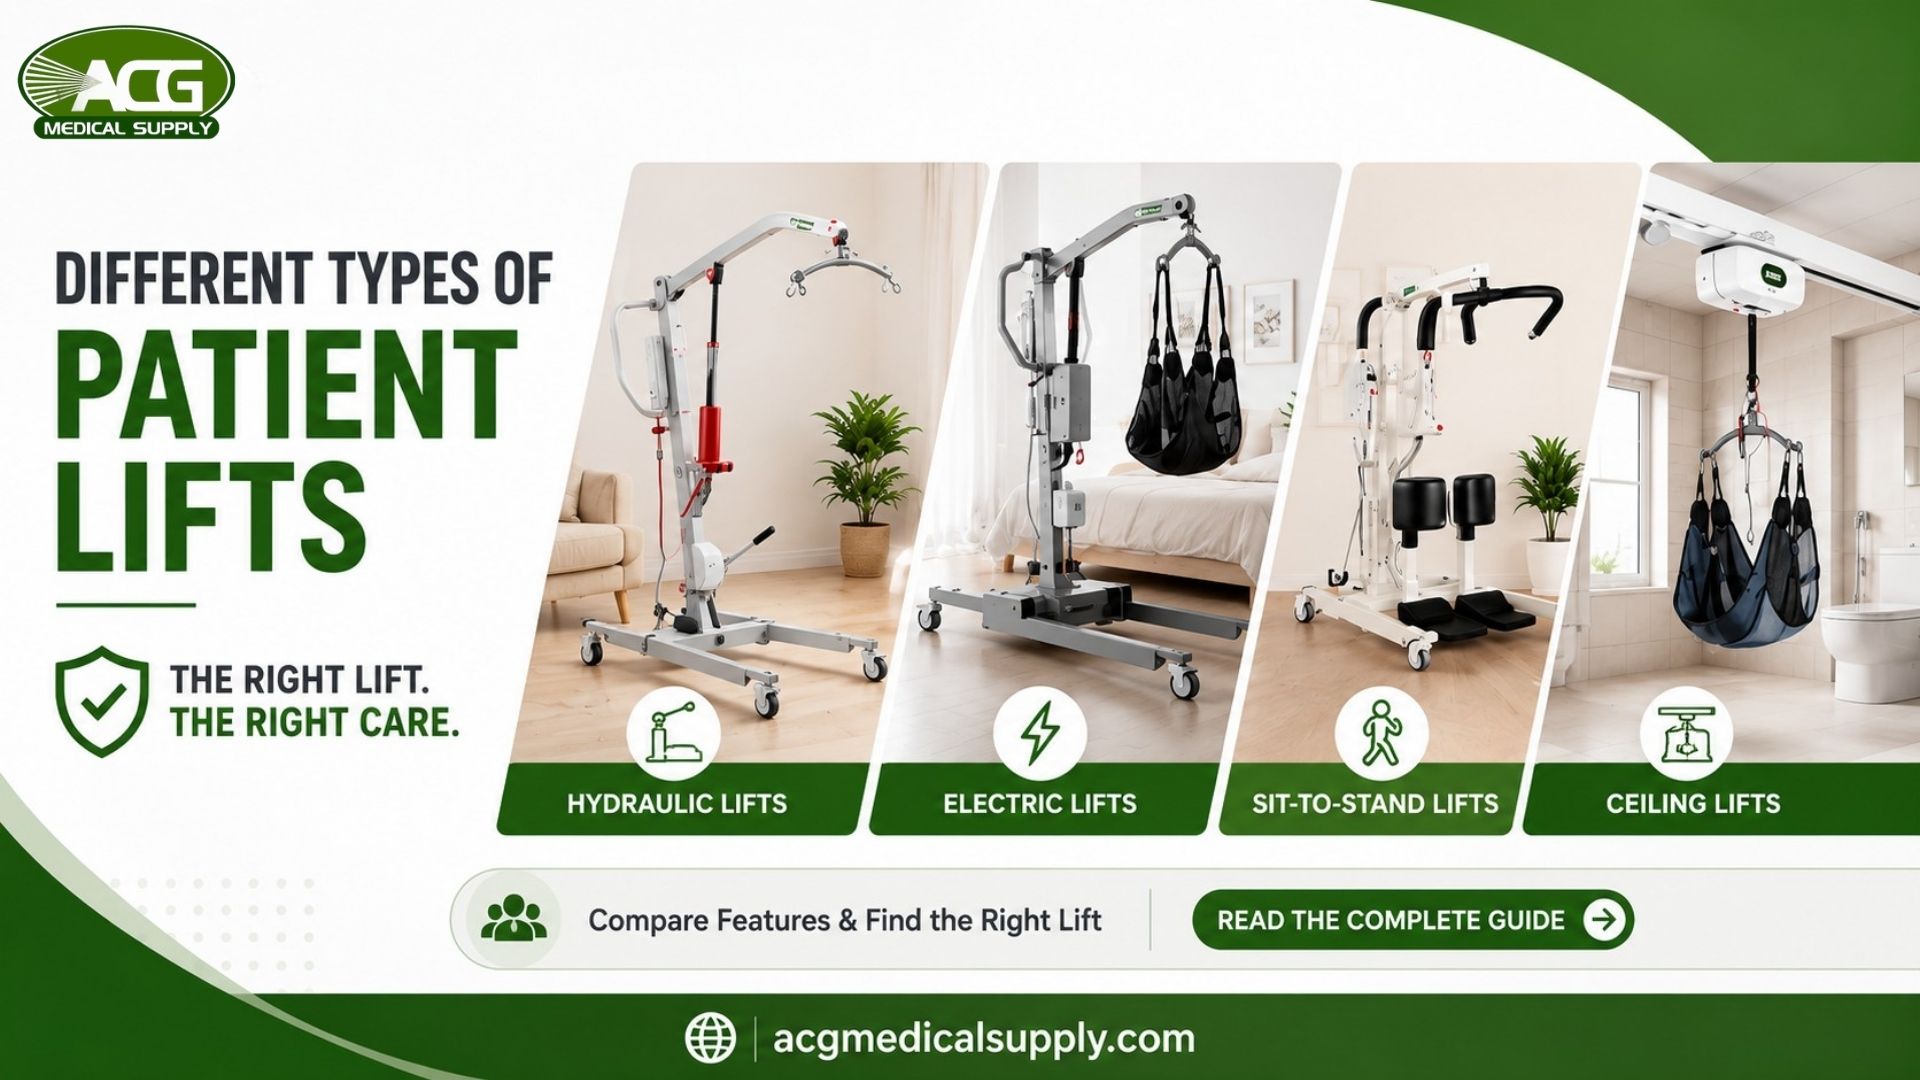
If you’ve ever helped someone from bed to chair by hand, you know the moment where your grip starts to slip, and you’re just hoping for the best. A patient transfer lift removes that guesswork. The motion is controlled, not sudden, which matters as much for the patient’s confidence as for the caregiver’s spine. There are several kinds, though: manual, electric, standing, and ceiling. We’ll break down what each one is and how it helps, so you can pick the right fit for your needs.
Manual Floor Lifts (Hydraulic Lifts)
These are the classic Hydraulic Patient Lifts, sometimes called Hoyer Lifts after one of the original manufacturers. The name’s stuck around the way “Kleenex” means tissue now, even on lifts from other brands. They work off hand-pumped hydraulic pressure rather than electricity: a lever pushes fluid through the system, and the lifting arm inches up with each pump.
The frame rolls on four wheels with a wide base underneath for stability. A caregiver slides a sling under the patient, hooks it to the spreader bar, then works the handle or foot pedal until the patient clears the surface.
No battery or motor to worry about means these are cheaper up front, simple to maintain, and they’ll still work through a power outage. They’re lighter too, which is nice if you’re wheeling one from room to room all day.
The downside is the pumping itself. It’s not difficult per se, but it’s real effort, and it adds up over a heavier patient or several transfers in one day. The lift also rises in small increments rather than one continuous motion, so it’s not the smoothest ride; still, if you’re on a budget and only need occasional transfers, it’s a solid choice.
Electric Floor Lifts
Now for something a bit fancier: Electric Floor Lifts. These are battery-powered patient lifts that do the lifting at the push of a button. Instead of pumping, you get a remote; it’s usually a simple box with up/down buttons that tells the motor to raise or lower.
The biggest advantage is ease. No muscle power is required from the caregiver at lift-time. It’s nearly effortless. The motion is super smooth and continuous, so the patient doesn’t feel any jerks. If your caregiver has a weak back or if you do multiple transfers a day, an electric lift can be a blessing. It’s user-friendly, and most patients find it more comfortable, too.
The trade-off is cost and upkeep. Electric lifts run well beyond what a manual one costs, and the battery needs regular charging, which means remembering to plug it in and having a backup plan if the power’s out and the battery’s dead too. They’re also usually bulkier because of the extra hardware.
Standing Lifts or Sit-to-Stand Lifts
Next up are Standing Lifts, also called Sit-to-Stand Lifts. These lifts are a little different: they’re meant for patients who can bear some weight on their legs (at least partially); they are not really made for someone who can’t use their legs at all.
Instead of a full-body sling, the patient wears a torso-and-leg harness and pushes up, with help, from a seated position into standing, using the lift’s frame for support. Once they’re up, the caregiver wheels them a short distance, chair to chair, or over to a raised toilet seat.
This comes up a lot after surgery or with mild weakness, where keeping someone using their own muscles is part of the point. It’s usually lighter and cheaper than a full hydraulic or electric floor lift too.
The limitation is pretty obvious: it only works if the patient has some leg strength and balance to start with. It’s not a fit for someone who’s bedridden or can’t bear weight at all, and it’s a bit less stable overall since the person stays upright and partly self-supporting the whole time.
Ceiling Track Lifts
Overhead or Ceiling Lifts skip the floor entirely. A track mounts to the ceiling, and a motorized carriage rides along it, lowering a sling to lift the patient and then gliding along the rail to move them, bed to bathroom for instance, without a bulky base taking up floor space.
Since there’s no wheeled frame to steer, one caregiver can usually manage a transfer alone, and the higher-end systems can handle heavier weights than a typical floor lift.
The catch is installation. You’re modifying the ceiling structure, which costs money and isn’t something you take with you if you move. It’s not portable the way a floor lift is either; you’re limited to wherever the track runs. For someone who needs frequent help throughout the day in a home that isn’t changing anytime soon, it can make single-caregiver care actually workable.
Bariatric Lifts
“Bariatric” just means built for higher weight capacities, often 500 to 700-plus pounds depending on the model, compared to roughly 400 pounds or less for a standard lift. These come in manual, electric, and ceiling versions, just reinforced: wider frames, bigger wheels, sturdier slings, sometimes dual hydraulic pumps.
If a patient’s weight is near or over a standard lift’s rating, this isn’t really optional. A lift straining past its limit is a safety risk for the patient and the caregiver both. The trade-off is mostly space and cost. Bariatric lifts are wider and heavier, so it’s worth checking your doorway widths before buying one.
Bath and Pool Lifts
Bathing and swimming come with their own transfer problems, and there are lifts built specifically for water.
Bath Lifts are portable seats that sit inside the tub. The patient transfers onto the seat from outside the tub, and the lift lowers them into the water and back out, manually or with a small battery motor depending on the model.
Pool Lifts work similarly but for swimming pools, either bolted to the deck or fully portable. A common design swings the seat out over the water on an arm, lowers the person in, then swings back once they’re done.
Both usually have lower weight limits than floor or ceiling lifts, often in the 200 to 350 pound range, and most fold down for storage since they’re not left sitting in the water full time.
How to Choose the Right Lift
Picking a patient lift for home use requires a bit of measuring and a lot of practical thinking. You have to measure the widths of the bedroom and bathroom doorways. You have to look closely at the space under the bed. Floor models need at least a few inches of clearance to slide their metal legs under the mattress so the boom arm can reach the person properly.
Think about the primary caregiver too. A heavy-duty manual model might save a little money upfront, but if the person operating it is elderly or has a bad shoulder, an electric model is the only logical choice.
ACG Medical Supply carries various configurations precisely because no two homes are identical. Every family has a different daily routine. You want a tool that immediately reduces stress in the house. Not one that adds frustration because it is too hard to push over a rug. Take the time to evaluate the floor surfaces, the room sizes, and the physical strength of the people managing the daily transfers.
Quick Reference
| Type | Best For | Setup Requirement |
| Manual Floor | Budget daily transfers | Caregiver strength to operate the pump |
| Electric Floor | Smooth, frequent transfers | Outlet for battery charging |
| Sit-to-Stand | Patients with some leg strength | Ability to sit up and bear partial weight |
| Ceiling Track | Tight floor space | Ceiling structure that can support installation |
| Bath Lift | Bathtub transfers | Standard tub dimensions |
| Bariatric | High weight capacity | Wider doorways for the larger frame |
FAQs
A device that moves someone who can’t stand or walk unassisted without the caregiver lifting them by hand.
Manual uses a hand pump, whereas electric uses a battery motor and remote, so it’s smoother but pricier.
Match the lift to the patient’s weight and mobility first, then fit that to your space and budget.
“Hoyer” is just a brand name that became shorthand for manual hydraulic floor lifts in general.
Moving someone who cannot support their own weight is tough. It takes a massive physical toll on the body. A human spine just isn’t built to twist, lift, and shift a full-grown adult multiple times a day. Caregiver burnout is a very real thing, and physical exhaustion plays a huge role in it, so investing in a proper patient transfer lift takes that dangerous strain right out of the equation. These devices turn a stressful, physically demanding process into a safe, calm routine.
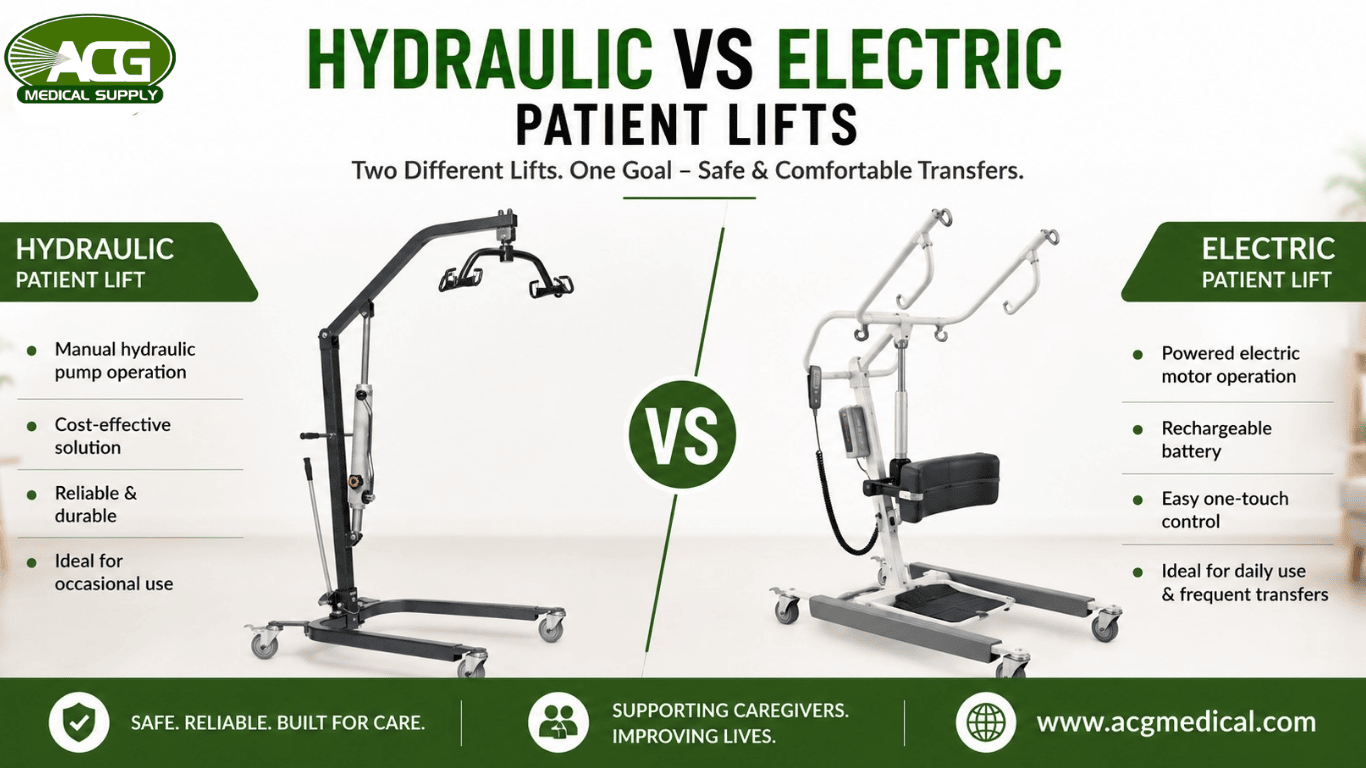
People hit a wall pretty quickly when trying to figure out the technical differences. The biggest choice always comes down to the power source. The whole debate of a hydraulic patient lift vs electric patient lift pops up immediately on every medical supply forum. The thing is, both machines do the same core job: they lift heavy weight so humans don’t have to. But how they actually go about that job is totally different.
What a Patient Transfer Lift Actually Does
A medical patient lift moves someone who can’t stand or walk unassisted between two points: bed to chair, chair to toilet, wheelchair to car seat. A sling wraps around the patient’s body and hooks onto the lift’s frame. The frame does the lifting. Nobody’s spine gets thrown out trying to half-carry an adult across a bedroom.
Every model on the market falls into one of two camps: pump-powered or battery-powered. That split is basically the whole conversation.
These lifts show up most in homes dealing with stroke recovery, advanced arthritis, ALS, or the general frailty that comes with age. Hospitals have used similar equipment for decades. Home caregivers are just catching up to the same idea, usually after one too many close calls trying to lift someone alone. Learning how to safely use patient lifts ensures those close calls don’t happen in the first place.
Hydraulic Patient Lift: The Pump-and-Lever Workhorse
A hydraulic patient lift runs on a manual hand pump that pressurizes fluid inside a cylinder, and that pressure pushes the lift arm upward. No batteries. No motor. Just a lever and some hydraulic fluid doing the heavy lifting.
The Lumex 1031fp, sold through ACG Medical, is a good example of what this category looks like in practice. It’s built from heavy-gauge steel, uses a six-point spreader bar with 360-degree rotation, and the base adjusts with a foot pedal so a caregiver doesn’t have to bend awkwardly.
Hydraulic Patient Lift Advantage
Cost is one of the biggest reasons people choose a hydraulic patient lift. Manual models are generally more affordable than electric alternatives, often costing hundreds of dollars less. Hydraulic lifts also don’t rely on batteries or charging, so they’re always ready to use. With fewer moving parts and a pretty simple hydraulic system, maintenance and repairs are also easier when servicing is required.
Hydraulic Patient Lift Disadvantages
The main drawback is the physical effort involved. Every lift requires the caregiver to pump the handle repeatedly, which can become tiring when several transfers are needed throughout the day. The lifting motion is also less continuous than that of an electric model, as the arm rises in small increments rather than in one smooth movement. When a hydraulic patient lift is used for multiple daily transfers, the repeated pumping can quickly lead to caregiver fatigue.
Electric Patient Lift: Push a Button, Let the Motor Work
An electric patient lift swaps the hand pump for a rechargeable battery and a small motor. All you have to do is press a button on a handheld remote, and the lift arm rises or lowers on its own. No pumping is required; therefore, there’s no arm fatigue by dinnertime.
The Raizer II by Liftup, also carried by ACG Medical, is one example of this type of lift. It is designed to help lift a person safely from the floor after a fall. The lifting process can be operated using either the handheld remote or the control panel built into the seat.
Electric Patient Lift Advantages
Smoothness is the headline feature. The lift moves in one continuous motion, which feels less jarring for the patient and takes the physical strain off the caregiver almost entirely. That matters a great deal for caregivers managing solo transfers, dealing with their own joint pain, or simply working without backup most days. One button, and the machine does the rest.
Electric Patient Lift Disadvantages
Cost is the first hurdle, often two to four times the price of a comparable hydraulic model. They also rely on a rechargeable battery, so regular charging is essential to ensure the lift is ready when needed. In addition, some electric models are heavier because of the motor and battery system, making them a little less convenient to move between rooms.
Hydraulic Patient Lift vs Electric Patient Lift: A Side-by-Side Look
| Feature | Hydraulic Patient Lift | Electric Patient Lift |
| Power source | Manual hand pump | Budget-conscious homes, backup lifts |
| Typical price range | $800–$1,500 | $2,000–$5,500+ |
| Physical effort required | Moderate to high | Minimal |
| Motion smoothness | Stepped, slightly jerky | Continuous, steady |
| Charging needed | None | Yes, regularly |
| Weight and portability | Usually lighter | Often heavier |
| Best suited for | Budget-conscious homes, backup lifts | Frequent transfers, solo caregiver |
Best Hydraulic Patient Lift and Best Electric Patient Lift Picks
Budget usually settles this dilemma fast. The Lumex 1031fp tops most best hydraulic patient lift lists for one simple reason: it costs a few hundred dollars against a few thousand. Steel frame, foot-pedal base, nothing to charge. It won’t win any awards for a gentle ride, but it holds up.
The Raizer II costs a lot more, and it earns that price in one specific situation: someone’s just fallen and can’t get up on their own. One button, off the floor, no caregiver straining a back trying to help. That’s the whole argument for calling it one of the best electric patient lift picks ACG carries, even at nearly five times the price of the Lumex.
One More Thing: Slings Aren’t One-Size-Fits-All
People buy the lift and forget the sling matters just as much. It’s the part that actually touches the patient, and it has to match the spreader bar and the person’s own size and weight. ACG Medical carries full-body mesh slings rated up to 600 pounds, including a commode-cutout version for bathroom transfers, built to work with both hydraulic and electric lifts. Order the wrong size, and it’s going back in a box, assuming nobody tries to use it anyway.
Conclusion
Budget is important, so is the patient’s weight, how many transfers happen a day, and how much energy a caregiver actually has left by evening. This patient lift comparison doesn’t have one right answer, whatever a neighbor swears by.
Three or four transfers a day wears a caregiver down fast if pumping’s the only option, especially with a heavier patient. Electric usually wins there. Comfortable with the handle and watching the budget closely, hydraulic does the job just fine, no complaints. A decent patient lift for home use turns a risky, two-person transfer into a one-person job. That part isn’t up for debate. ACG Medical stocks both categories, along with the slings and spreader bars that go with them.
FAQs
No, they run on rechargeable batteries that need periodic charging.
Yes, though it takes more physical effort than an electric model.
Standard models typically support 400 to 600 pounds; bariatric versions handle more.
Often yes, as long as the spreader bar and weight rating match.
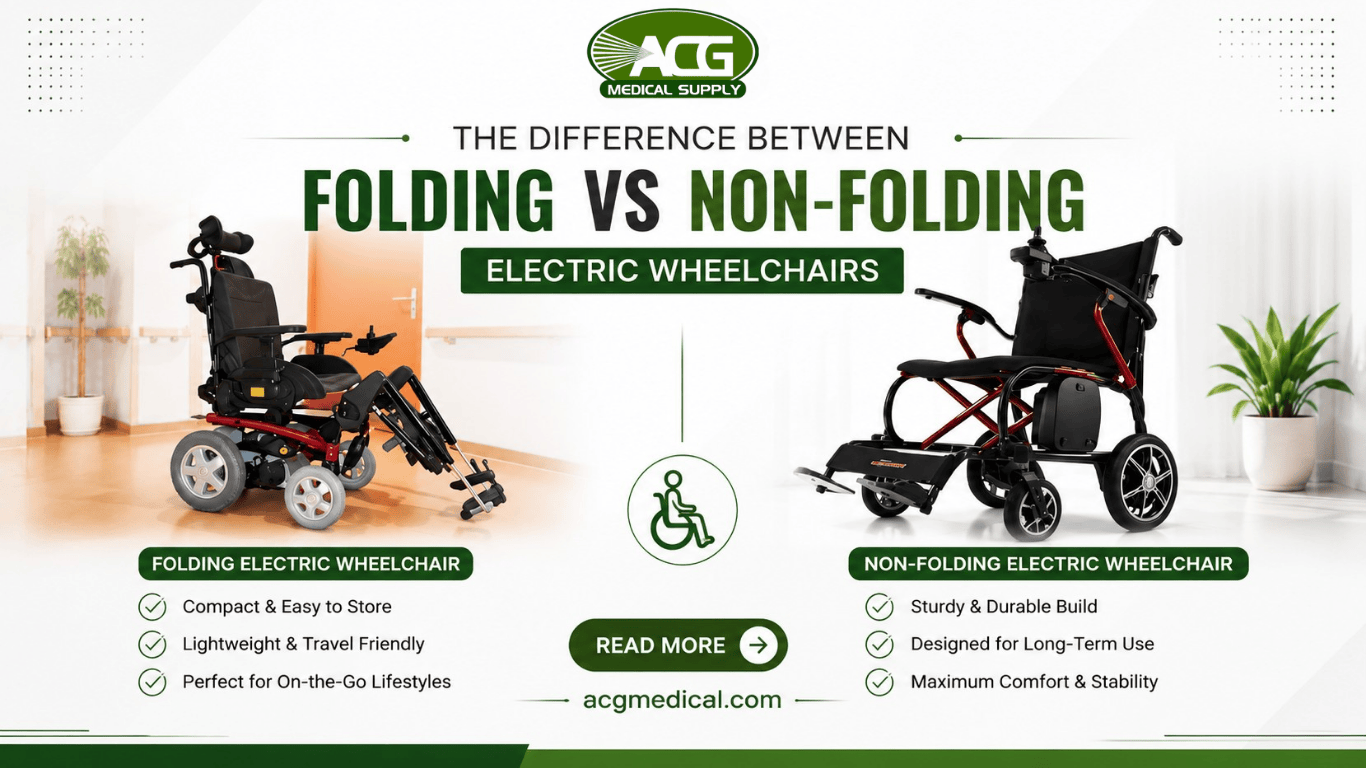
Making the jump to a motorized mobility device is a really huge step. It gives people their freedom back. Going to the park with the grandkids or getting coffee down the street isn’t an exhausting chore anymore. But standing in a showroom or browsing online brings up a massive choice right out of the gate. Choosing between a foldable and a non-foldable electric wheelchair changes how you travel, store, and use the device every single day.
An electric wheelchair takes much of the physical effort out of getting around, so you can think less about the journey and more about where you’re going. The motors handle the hard work. You steer.
Doing a quick electric wheelchair comparison helps clear up the confusion so you can buy exactly what fits your life.
Unpacking the Benefits of Foldable Electric Wheelchairs
People who travel often tend to lean towards foldable models, and it’s easy to see why. A foldable electric wheelchair is designed to pack down quickly and take up less room. On many models, you pull a release lever, fold the frame, and you’re done. It closes almost like a heavy-duty lawn chair. Simple, but very useful.
This portability can make everyday travel much easier for families. Depending on the chair’s folded size, it may fit into the cargo area of a standard vehicle without requiring a permanent wheelchair lift. A lighter folding model may also be easier for a caregiver to load, although the chair’s total weight should always be checked first. Some are still surprisingly heavy.
Some lightweight electric wheelchair models use aluminum or carbon-fiber frame components to bring the overall weight down. That can make storage and transport less awkward, especially for people who are often in and out of the car.
Foldable models can also be practical for air travel, but battery rules need checking before the flight. Battery type, capacity, and whether it can be removed may affect how the chair is handled. Airline procedures can vary too, so contacting the carrier before the trip is a sensible move. A little planning here can save a lot of airport confusion.
The Drawbacks of Foldable Electric Wheelchairs
Everything comes with a trade-off. A folding power wheelchair has to balance portability with everyday comfort. Some folding models use simpler seating systems to keep the chair compact and reduce overall weight. The seats and backrests may still be comfortable, but a person who spends ten hours a day in the chair could need more positioning or pressure support than a basic folding seat provides.
Battery range also deserves a closer look. Some portable models offer a shorter travel range than larger power chairs, although this varies widely from one chair to another. User weight, slopes, speed, grass, gravel, and other high-resistance surfaces can all affect how far the chair travels on a charge. A range that works perfectly for shopping and appointments may feel limiting on a long day outdoors.
The ride quality itself can be a bit bumpier. Depending on the wheel size, tires, and suspension, some lighter folding models may feel bumpier on cracked sidewalks or uneven ground. Hitting a crack in the sidewalk transfers that jolt right up through the seat. It is definitely manageable, but you will feel those bumps more than you would in a heavier chair.
Moving on to the Benefits of Non-Foldable Electric Wheelchairs
Sometimes, you just need a tank. A non-foldable electric wheelchair is designed for serious, all-day comfort and stability. These are the heavy-duty machines built on rigid, solid bases. Because the engineers do not have to worry about making them fold up, they pack them with massive motors and huge, long-lasting batteries.
The comfort level on these chairs is completely unmatched; they usually feature thick, contoured captain’s seats that feel like premium living room furniture. Many non-foldable chairs even offer power-reclining options or specialized tilt features. These seating systems help distribute body weight perfectly, preventing painful pressure sores during long days.
These robust mobility electric wheelchairs also handle rough terrain brilliantly. Some models are designed for outdoor surfaces and may include larger drive wheels or suspension, while others are built mainly for indoor use. Drive layout matters as well. Mid-wheel-drive chairs can offer a tight turning radius, but front-wheel and rear-wheel-drive designs are also available. Checking the chair’s turning radius and overall width is far more reliable than assuming every non-folding model will handle a narrow hallway or bathroom easily.
The Drawbacks of Non-Foldable Electric Wheelchairs
The biggest issue with a rigid frame is transportation. You cannot just fold these chairs up and toss them into the back of a Honda Civic. They are really heavy; many models weigh a few hundred pounds with the batteries installed.
Taking a non-folding chair in a vehicle usually requires more planning. Depending on the chair’s size and weight, a ramp, vehicle lift, wheelchair-accessible van, or another suitable transport setup may be needed. Manual lifting is generally impractical for heavier models and can create an unnecessary lifting risk. That is a significant extra expense that families have to plan for.
Storage inside the home also requires some thought. Because they do not fold flat, they take up the same amount of floor space whether you are sitting in them or not. You need a dedicated spot in the house, usually near a wall outlet, to park and charge the chair every night. You cannot just tuck one away in a hall closet when company comes over.
How to Pick the Best Electric Wheelchair for Your Lifestyle
Think about what your week actually looks like. Not the occasional holiday or once-a-year family trip, but an ordinary Monday through Sunday. That’s usually the easiest way to narrow down the right chair.
If you’re constantly getting in and out of cars, running errands, visiting friends, or flying, a folding model is probably going to make life easier. It packs down, takes up less space, and is far simpler to move from one place to another. You may give up some of the thicker seating found on larger chairs, but for someone who’s always on the move, that’s often a fair trade.
Spend most of your time at home or close to it? A non-folding chair may suit you better. The larger frame and more supportive seating can feel much more comfortable over longer periods, especially when the chair is used throughout the day.
ACG Medical Supply carries both styles, so you don’t have to decide based on a product photo and a list of specifications alone. Our team can help you look at your routine, your transport needs, and how you expect to use the chair before choosing a model.
Get that choice right, and you spend less energy thinking about the chair. You can save it for the places you’re actually trying to get to.
Quick Information Chart
| Feature | Foldable Models | Non-Foldable Models |
| Transport | May fit in standard vehicle cargo spaces, depending on folded size. | May require a ramp, vehicle lift, or accessible transport setup. |
| Comfort | Seating varies; some models use simpler systems to stay compact. | May offer more advanced seating and positioning options. |
| Battery Range | Range varies by battery capacity, chair design, and use. | Range varies by model and battery capacity. |
| Durability | Built with frames designed to balance strength and portability. | Fixed-frame construction designed for regular powered mobility use. |
| Turning | Turning radius varies by model. | Handling depends partly on front-, mid-, or rear-wheel-drive design. |
FAQs
Folding models with lithium batteries are usually airline-approved and best for flights.
Yes, their heavier frames and advanced suspension absorb rough bumps easily.
Many lightweight frames support up to 300 pounds, but heavy-duty non-folding chairs handle much more.
No, they collapse to fit right inside a standard car trunk.
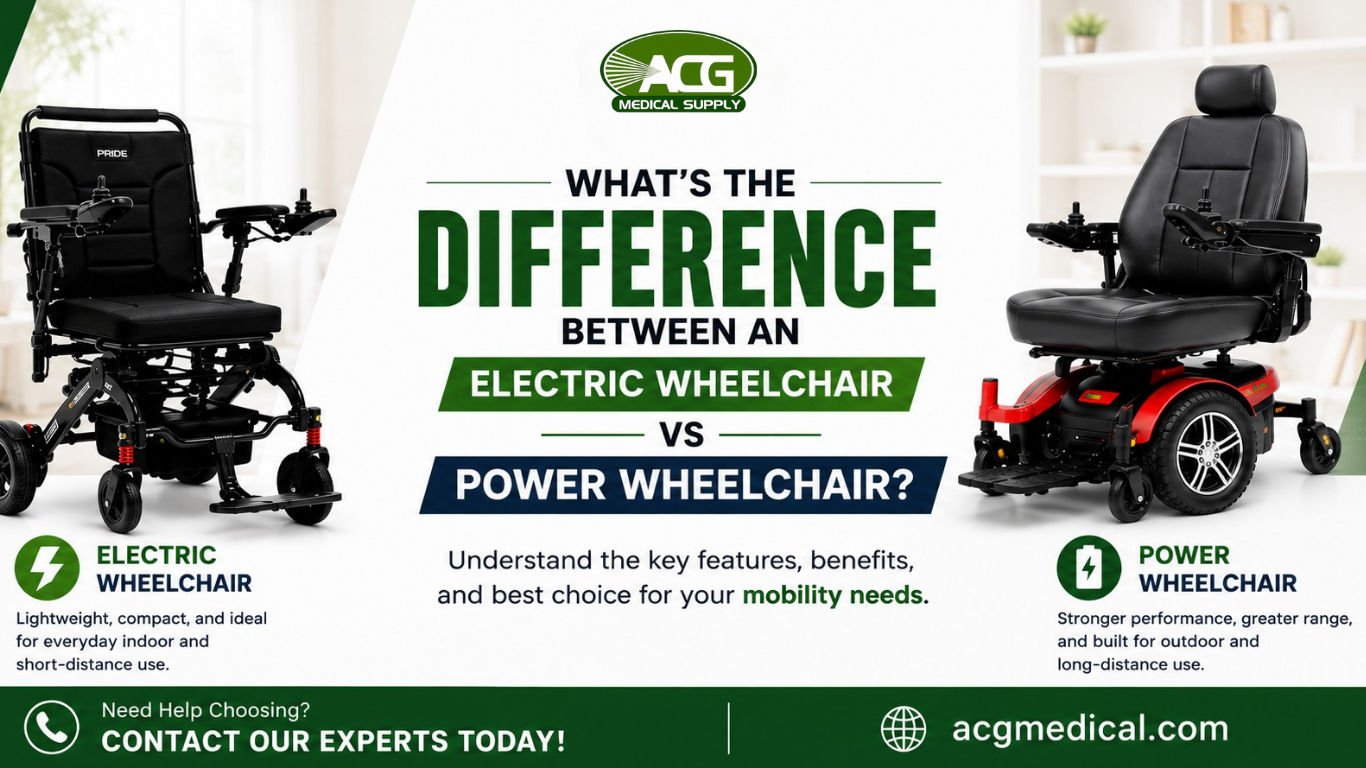
Getting a new mobility aid is a massive step toward pure independence. It means saying yes to more family trips and weekend errands, and that is incredibly exciting. Think of it as unlocking a whole new level of freedom. But jumping online to start shopping usually throws people right into a wall of highly confusing industry vocab.
A lot of folks end up scratching their heads. You might hear someone talk about an electric wheelchair, then someone else insists that a power wheelchair is the only way to go. On paper, they both run on batteries and have motors. But out in the real world, these terms point to entirely different lifestyles.
The secret is looking past the clinical names. It comes down to matching the metal and wheels to an actual daily routine. Some machines are built to be tossed in a trunk for a quick afternoon trip. Others act as a permanent, ultra-comfortable living room on wheels. Figuring out which one matches a specific lifestyle makes all the difference.
Getting to know the travel-friendly electric wheelchair
When people in the medical supply world talk about an electric wheelchair today, they mean convenience. These are the newer, highly portable models that completely changed how people travel. A few decades ago, adding a motor meant accepting a giant, heavy machine. Now, engineers use clever materials like aluminum and carbon fiber to keep things incredibly light.
The entire goal is adaptation. A solid travel chair folds up almost exactly like a lawn chair. You just pull a hidden lever, and the whole frame collapses flat in seconds. Some folks might disagree, but this simple feature is a total game-changer. It means a family member can easily lift the folded frame into the back of a small car. No need to buy an expensive ramp.
To keep the lifting weight down around forty pounds, the design stays pretty minimal. The seating is usually a breathable mesh sling. It feels great for a few hours at a restaurant or a school play. The wheels are slightly smaller and made of solid rubber, which roll beautifully across smooth indoor floors and paved sidewalks.
Knowing the types of electric wheelchairs
You’ll generally find two ways these machines pack up:
- Folding Frames: The whole thing squashes down into one piece. You pull a release, the frame folds flat, and you slide it into the trunk.
- Split-Frame Units: These don’t fold. They unlatch. The seat lifts off, the battery slides out, and the base detaches. This helps if you can’t lift fifty pounds at once but can handle three separate fifteen-pound pieces.
Moving up to a full-sized power chair
Now, look at the other side of the showroom. A traditional power chair ignores portability. It doesn’t care about your car trunk. It is built to be your base of operations all day long.
These machines are heavy. Often, they weigh north of 200 pounds. That weight keeps you safe. A heavy base means you don’t tip over when rolling down a sidewalk ramp or crossing a thick carpet. If you spend eight to twelve hours a day in a seat, the flimsy mesh of a travel chair will eventually destroy your back. You need the deep-cushioning and stable base that only a full-sized power wheelchair provides.
Exploring the types of power wheelchairs
The drive-wheel placement dictates how you live with the machine:
- Mid-Wheel Drive: The wheels sit under your hips. The machine turns on a dime. Essential for tight hallways.
- Front-Wheel Drive: It pulls you over bumps. Great for thresholds and outdoor grit.
- Rear-Wheel Drive: It acts like a standard car. Very stable at higher speeds.
Breaking down electric wheelchair features vs. power wheelchair features
Let’s be blunt about the tech. Electric wheelchair features are meant to be simple. You get a basic joystick, a speed knob, and a battery light. That’s it. You aren’t meant to live in these chairs for days on end; you are meant to use them to get there.
Power wheelchair features are a totally different animal. We are talking about heavy-duty suspension, specialized seating, and intricate controls. These are machines that don’t just move you; they actively support you.
Many power wheelchairs for adults come with complex actuators that change your seating position throughout the day. This is the medical-grade stuff. A tilt-in-space feature rotates the seat backward without changing the angle of your hips, which shifts your body weight away from your tailbone to protect your skin. You can’t get that level of medical support on a travel folder.
The steering is also night and day. A heavy-duty base acts as a highly programmable joystick-controlled wheelchair interface. If you have hand tremors or limited muscle control, a technician can “tune” the joystick to smooth out your movements so you don’t lurch forward. They can adjust the acceleration curves and the braking sensitivity to match exactly what your hands can do. You can’t do that on a cheap, off-the-shelf travel frame.
Why do people turn to ACG Medical Supply
ACG Medical Supply keeps a wide range in stock, ultra-light folding frames from Forcemech and Journey on one end, heavier Pride Mobility and Golden Technologies models on the other. There’s no single “best” chair, only a best chair for a specific body and a specific budget. ACG also runs showroom locations, so buyers can sit in a chair before committing to it, along with delivery and setup once it arrives. A spec sheet only tells half the story; sitting in the chair tells the rest.
Understanding the investment
There is a final, uncomfortable truth to face: the cost.
People are often shocked by the price difference. A high-quality travel chair is an investment, but a full-sized power model is a massive, life-altering expense. Why is there such a huge gap?
You are not just paying for a seat and a motor; you are paying for the medical-grade seating systems that prevent sores; you are paying for the advanced control modules that adapt to your specific hand strength; you are paying for the heavy-duty motors that will run for years and years, not months.
When you look at a heavy-duty model, you aren’t looking at a luxury item; you are looking at a medical necessity, and you are paying for reliability. In the world of mobility, reliability isn’t a luxury; it’s the main difference between being stuck inside and being out in the world.
Quick Information Chart
| Feature | Portable Power Chair | Standard Power Wheelchair | Mobility Scooter |
| Steering | Joystick | Joystick | Tiller/handlebars |
| Best for | Travel, tight spaces | Daily indoor/outdoor use | Longer outdoor trips |
| Weight capacity | Usually 250–300 lbs. | 300–450+ lbs. | 250–500 lbs. |
| Battery range | 8–12 miles | 10–20+ miles | 10–30+ miles |
| Trunk support needed | Low | Low to moderate | Moderate to high |
Conclusion
The names may sound different, but choosing between an electric wheelchair and a power wheelchair should come down to function, not marketing. It should be a choice made with your eyes open, understanding exactly what you are getting. Don’t let the marketing terms trick you into buying something you don’t want. If you need something to throw in the car for a trip, look for the word “folding” and check the weight carefully. If you need something to support your body for twelve hours a day, ignore the “portable” claims and look for a solid base with good seating.
Use the resources available, talk to the experts at ACG Medical Supply, and get the mobility device that lets you live the life you want to live.
Independence is worth the effort it takes to find the right tool.
Frequently Asked Questions
Yes, most travel-friendly models use lithium-ion batteries that meet strict airline safety regulations.
Not if you choose a mid-wheel drive model; they spin in place and handle tight corners with ease.
No, that is the main benefit; they are designed to fold and fit into standard passenger car trunks.
No, the handlebars on a scooter will physically block you from getting close to any table or desk surface.
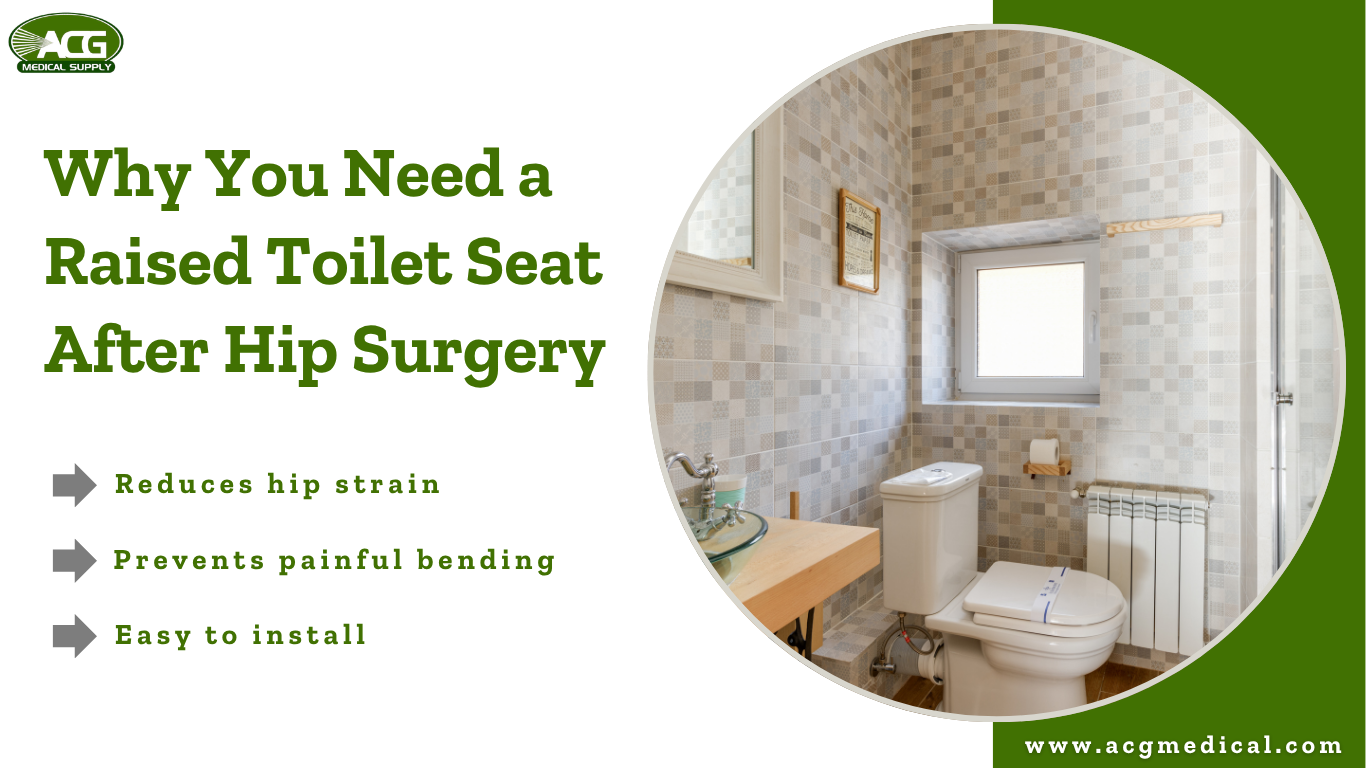
You survive the surgery. The anesthesia wears off. You’re back home, maybe a day or two after the procedure, and someone is hovering nearby with a look on their face that says Please don’t fall. But you don’t understand why.
And then you use the bathroom on your own for the first time; that’s when it hits.
The toilet is low. Your new hip isn’t bending the way your old one did. And your surgeon’s voice is somewhere in the back of your head saying something about ninety degrees. You didn’t fully absorb what that meant when they said it. Now you do.
Raised Toilet Seat After Hip Surgery: Quick-Reference Table
Before getting into the details, here’s a basic breakdown of the main types you’ll come across, what they offer, and who they work best for.
| Type | Height Added | Arms Included | Weight Capacity | Best For |
| Standard Fixed Riser | 2–4 inches | No | Up to 300 lbs | Mild restrictions, anterior approach patients |
| Adjustable Riser | 2–6 inches (adjustable) | No | Up to 300 lbs | Patients sharing a bathroom with non-surgical users |
| Raised Toilet Seat with Arms | 2–5 inches | Yes | Up to 350 lbs | Anyone with limited upper or lower body strength |
| Locking Riser with Arms | 3–5 inches | Yes | Up to 400 lbs | Posterior approach patients needing extra stability |
| Bariatric Raised Toilet Seats | 2–5 inches | Yes (most models) | 500–750+ lbs | Higher-weight patients requiring reinforced support |
| Hinged Riser (flip-up) | 3–4 inches | Yes | Up to 300 lbs | Households where the toilet is used by multiple people |
Height, arms, and weight capacity are the three things that are the most important. Everything else is secondary.
The Reality of the 90 Degree Rule Hip Replacement
When you leave the hospital, the doctors hand you a list of rules. The big one is usually the 90-degree rule. It sounds simple enough: don’t bend your hip more than 90 degrees. But in a regular house, almost everything is designed to make you break that rule. Your favorite armchair? Too low. The car seat? Definitely too low. The toilet? That’s the worst offender.
If your knees are higher than your hips when you sit, you’ve already broken the 90-degree rule hip replacement protocol. For someone who had a posterior hip replacement, the stakes are even higher. The way the joint was accessed makes it easier to pop out of place if you lean too far forward or squat too deep. You’re essentially trying to keep that new joint nestled in its socket while the tissues around it heal. When you sit on a standard-height toilet, your hip is forced into a sharp angle. A lot of pressure on a spot that’s basically held together by hope and heavy-duty stitches in those first few weeks.
That’s the whole point of a raised toilet seat after hip surgery. It closes the gap.
What a Toilet Seat Riser for Hip Replacement Actually Does for You
People think of it as a medical device. And yes, technically it is. But day-to-day, it’s just something that makes a regular toilet usable again without risking everything you just went through in the operating room.
A toilet seat riser clips or locks onto your existing toilet and raises the sitting height, usually by 2 to 6 inches, depending on the model, so you don’t drop as far. Less drop means less hip flexion. Less hip flexion means you’re staying inside a safe range.
Some versions have arms that extend on either side, so you can push yourself up or lower yourself down with your hands. That’s not a luxury add-on. For most post-surgical patients, a raised toilet seat with arms is the only reason they can manage the bathroom alone in the first few weeks. The arms do the work your hip muscles can’t yet do.
Posterior Hip Replacement Precautions vs. Anterior Hip Replacement Toilet Seat Needs
With posterior hip replacement, the restrictions tend to be stricter. The posterior approach goes in from the back of the hip, and the muscles that prevent dislocation take a bigger hit. The 90-degree rule gets enforced harder; bending forward is restricted, and some surgeons add rules about crossing the legs or rotating the foot inward. A raised seat isn’t optional here. It’s genuinely part of staying safe.
Anterior hip replacement is a different situation. The incision goes through the front, leaving more posterior muscles intact. Many anterior patients have fewer movement restrictions and heal faster. Some surgeons skip the 90-degree rule entirely for these patients. But even so, sitting down on a low toilet is painful and awkward in the early weeks, no matter which approach was used. An anterior hip replacement toilet seat riser is still needed, even with lighter restrictions.
Ask your surgeon which approach they used and specifically whether hip precautions apply. That answer changes both what you need and how long you’ll use it.
Choosing the Right Hip Replacement Toilet Seat
Toilet Riser Height for Hip Surgery Recovery: How Much Lift Is Enough?
No blog can answer this as precisely as your PT can. A rough starting point, most people find 3 to 4 inches of added height gets them into a comfortable, compliant range. If your toilet is already on the higher side, you might need less. Adjustable models are worth the extra cost, especially if someone else is using the same bathroom and doesn’t need the riser.
Bariatric Raised Toilet Seats: When Standard Capacity Doesn’t Apply
Most standard raised seats are rated for 250 to 300 pounds. That works for a lot of people, but not for everyone. Bariatric Raised Toilet Seats are built for higher weight limits, often 500 to 750 pounds, with reinforced frames and wider seating surfaces. If this applies to you or someone you’re shopping for, this isn’t a detail to skim past. Weight capacity is safety-critical here.
Picking Something That Actually Works for You
When you’re browsing, you’ll see a lot of options. Options range from discreet, slim designs to heavy-duty models. You will find variations that clip on or lock securely into place, with or without supportive armrests. It’s easy to grab the first one with decent reviews and move on.
The right hip replacement toilet seat for you depends on your strength, your bathroom layout, and how long you expect to use it. Still shaky on your feet? A raised toilet seat with arms is usually worth the extra bulk. Is space tight? A low-profile riser that just clips on might do it. Carrying extra weight, a bariatric raised toilet seat keeps things stable instead of feeling like it might shift under you.
Round and elongated toilet bowls also require different seat shapes. A riser designed for one will wobble on the other. Make sure to verify the bowl shape and confirm the weight rating fits the user’s actual weight. Lastly, look into the installation process to see if it requires tools or simply locks into place.
ACG Medical carries options across all of these categories, adjustable height, with and without arms, standard and bariatric raised toilet seats, fitting both round and elongated bowls. To understand exactly which of these features fits your home, explore our complete article on how to choose a raised toilet seat for your toilet. Product specs are detailed, and their team can help narrow it down if you’re not sure where to start.
Conclusion
Recovery from hip replacement surgery is genuinely manageable. People do it every day and come out walking better than they have in years. But those first weeks at home, that’s where things can go sideways if the setup isn’t right.
Get the toilet seat riser for hip replacement before you come home. Set it up before you need it. Everything’s harder to figure out at 2 a.m. when you’re already standing in the bathroom and realizing you haven’t thought it through.
FAQs
Most people use it for 6-12 weeks, or until their doctor says normal sitting is safe.
You can try, but it often puts too much bend on the hip and increases discomfort and risk.
It should keep your hips higher than your knees when seated, usually adding 3–5 inches of height.
They’re helpful if you need extra support while sitting down or standing up.
It depends on your plan and how the item is classified. Medicare Part B may cover it as durable medical equipment if your doctor prescribes it and the supplier is enrolled. Private insurance varies. Call before you buy to confirm coverage. Don’t assume.
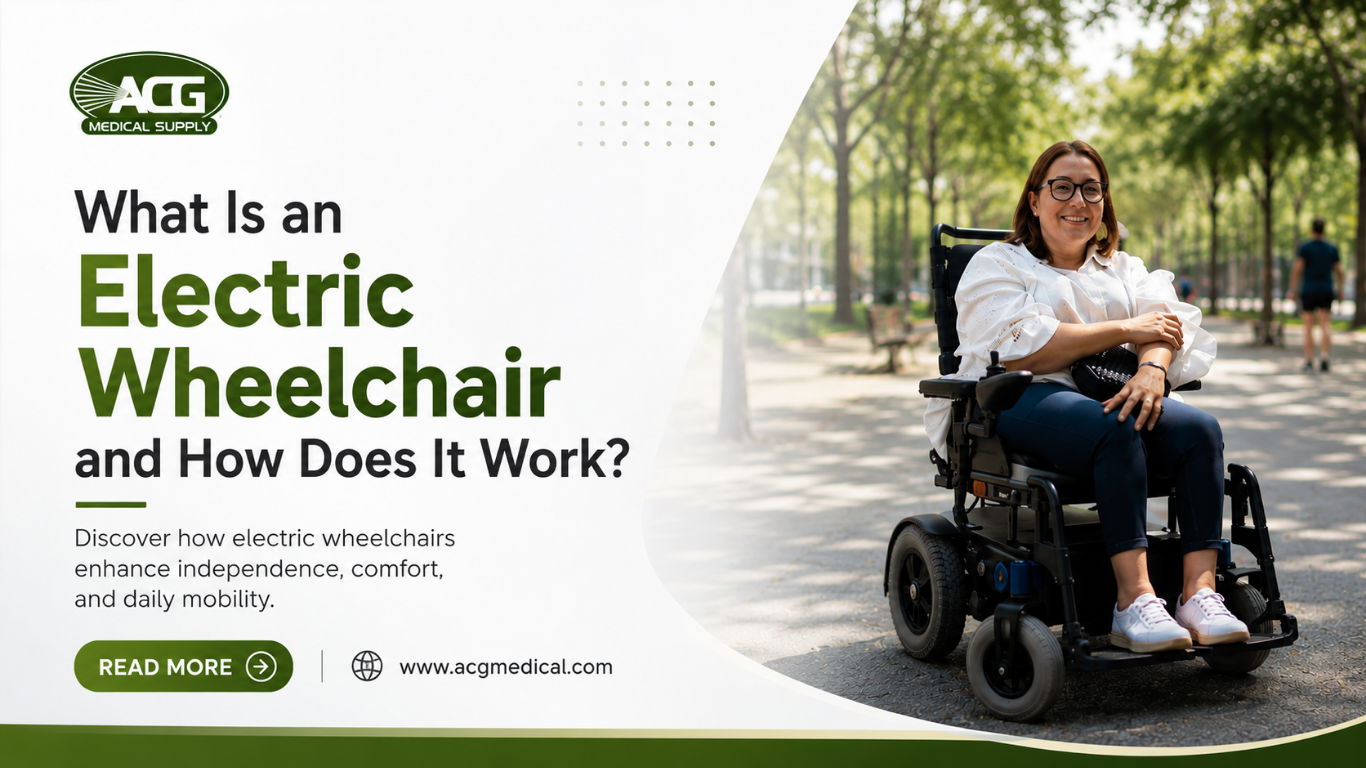
Rotator cuff damage shows up in long-term manual wheelchair users at a rate that genuinely catches both patients and medical professionals off guard. Years of self-propelling put the delicate human shoulder joint through a daily, repetitive workload it was never meant to handle. Over time, the major reason why the modern Electric wheelchair exists today.
But not all of them steer the same way, run the same distance, or fit the same body. A power wheelchair built for outdoor terrain is a fundamentally different machine from a nimble chair designed to maneuver through the tight corners of a small apartment. The battery in a travel-ready folding electric wheelchair works differently from the one in a heavy-duty daily-use chair. These nuanced differences are not minor details; they are the core variables upon which a user’s entire mobility and independence depend. In this thought leadership piece, we will explore the engineering, variety, and profound lifestyle impacts of these essential devices.
How Does an Electric Wheelchair Work?
Understanding how an electric wheelchair works is easier than you would expect. The foundation consists of three primary components: a battery, two small motors, and a joystick.
The electric wheelchair battery sits securely under or behind the seating system, acting as the lifeblood of the device. The motors spin the wheels. The rider uses a wheelchair joystick control (a small stick on the armrest) to direct the chair in the direction they want. When they push it forward, the chair rolls forward; when they push it left, it turns left. It’s not that different from steering a car, and the riders get comfortable with it within a few minutes of trying.
Now, how does an electric wheelchair work for someone who can’t use their hands? Good question. Some people use a chin-operated joystick instead; some people blow into a tube (a system called sip-and-puff), and the chair responds to that; and some use head movement to move the chair. The core drive system remains unchanged; it is simply the method of human-machine communication that evolves to meet the user’s specific physical requirements.
Next is the battery. An electric wheelchair’s battery range is usually somewhere between 10 and 20 miles on a full charge. Different environments like hills, heavier riders, and rough ground all of that bring the number down. Charging the wheelchair takes somewhere around 6 to 8 hours. Lithium-ion batteries are lighter and charge a bit faster. Sealed lead-acid ones are cheaper and easier to find replacements for. Neither is the obvious winner; it all depends on the situation.
Electric Wheelchair Features That Actually Affect Daily Use
A lot of specs get listed under electric wheelchair features. Some of them are actually important, and some of them are there just to fill the page.
Seat size is one thing people get wrong, and it is very consistent (not a good thing). A seat that’s too wide means the rider is leaning to one side all day; if it’s too narrow, the pressure on the hips builds up, and for someone sitting in this chair for six, eight, ten hours a day, that’s not a minor thing; it leads to severe skin and posture problems over time. The same goes for where the footrests sit and whether the armrests flip back for easier transfers.
Drive wheel position is something worth understanding before buying a motorized wheelchair. Mid-wheel drive (where the big wheels sit directly under the rider) gives the tightest turning circle; it’s absolutely brilliant for small kitchens and narrow hallways. Rear-wheel drive is steadier at speed, and they handle outdoor surfaces better. Front-wheel drive is less common,n but it copes well with rougher terrain.
Speed is usually between 4 and 6 mph on standard models. Some can even go faster, er but for getting around a house or popping to the shops, 4 mph is fine.
Types of Electric Wheelchairs
There are several different types of electric wheelchairs that look pretty similar to each other in online photos. In real life, they’re set up for different use cases entirely.
Folding electric wheelchairs exist because everyone goes out and about, and they need to get their chair in and out of a car. The frame folds down (sometimes with one pull of a strap) in a small enough size to fit in a standard boot. The downside is they weigh a bit more because of the extra folding parts.
Lightweight electric wheelchairs tackle that weight problem head-on. Carbon fiber frames have gotten some models down to around 33 lbs. ACG Medical carries the Cricket Power Wheelchair at exactly that weight. When the person lifting the chair into the car isn’t the one riding it (a spouse, a family member, a carer), that weight difference is genuinely felt. Airports are another story altogether, because you know baggage handlers are not known for their gentleness.
Heavy-duty chairs are built for none of that. Wider seats, reinforced frames, and weight capacities going up to 450 lbs or more. They are built to last under daily use, not to be lifted into a boot every morning.
Benefits of Electric Wheelchairs
Getting a motorized chair is really about saving energy. The sheer physical exhaustion of fighting a mobility issue drains a person’s mood and motivation. The main benefits of electric wheelchairs revolve around eliminating that friction; users save their stamina for the good parts of life.
Another massive perk is the flawless indoor-outdoor mobility. Nobody has to switch from a walker to a scooter just to get the mail. A user can drive from the kitchen tile, over the living room rug, out the front door, and down the concrete sidewalk all in the same comfortable seat. Modern tires handle different textures brilliantly without getting bogged down.
Accepting the need for one of these chairs is a major emotional hurdle. That makes complete sense. But once people leap, they wish they had done it years earlier. The relief of just moving through the world without pain or extreme fatigue cannot be overstated. It gives people their time, their freedom, and their confidence back.
Mobility Aids Overview
Understanding the landscape of available assistance is vital for comprehensive care. Below is a quick reference guide to standard mobility aids:
| Type of Aid | Key Feature |
| Canes | Lightweight and portable |
| Walkers | Four-legged for extra support |
| Wheelchairs | Manual or powered options |
| Scooters | Electric with user-friendly controls |
Conclusion
The engineering behind the modern Electric wheelchair has evolved significantly from the bulky, difficult-to-transport devices of the past. Today’s market offers highly specialized options capable of fitting seamlessly into a vastly wider range of lifestyles, travel habits, and medical needs. For an extensive look at top-tier mobility solutions tailored to individual requirements, you can explore specialized models and expert guidance at ACG Medical Supply.
FAQs
No, driving is super simple and takes just a few minutes to learn.
Plug it into the wall every night before you go to sleep.
Yes, most of the lighter folding models are allowed on planes.
No, standard models use smooth tires that are safe for house floors.
Mornings are supposed to be slow coffee, maybe a stretch before anything else. Stiff joints don’t care about that plan. A shoulder that won’t budge, knees that complain on the first step, fingers that can barely grip a mug, getting out of bed turns into its own ordeal.
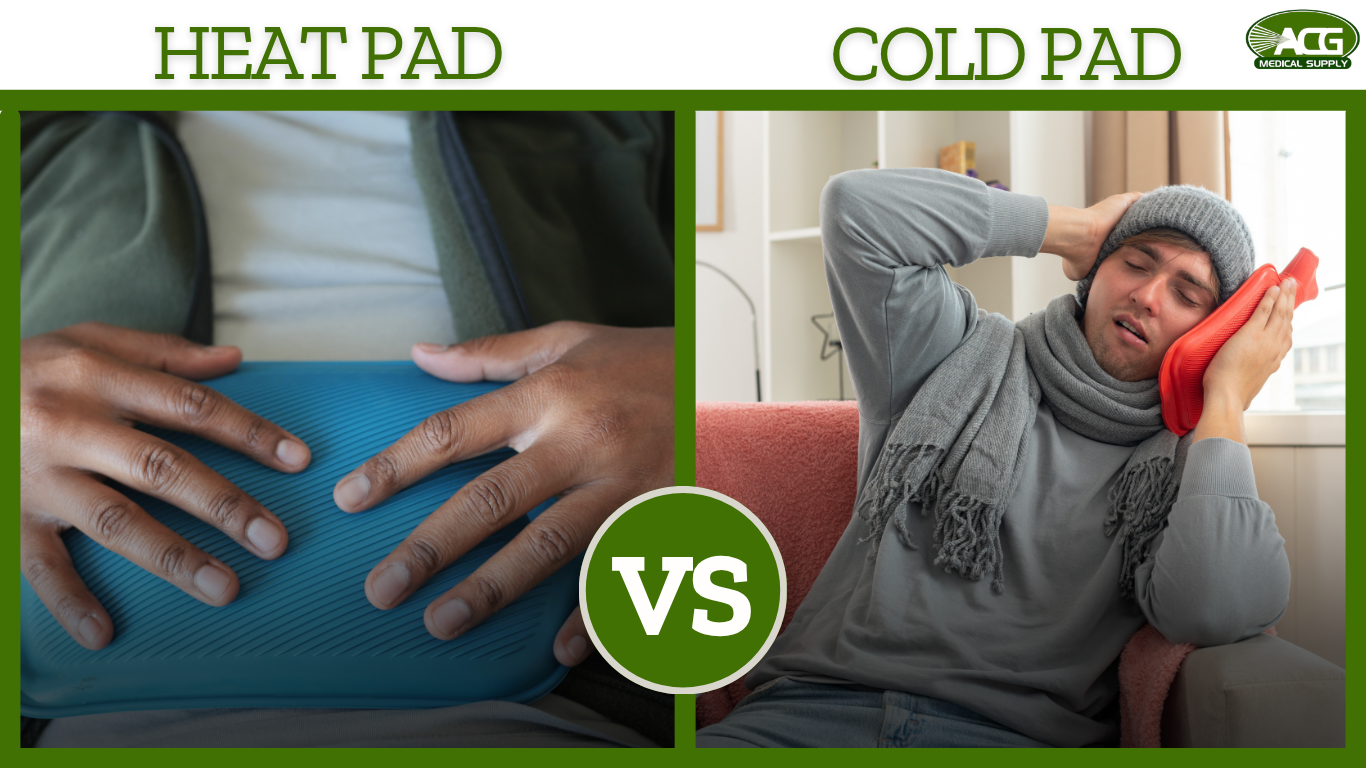
People spend a small fortune on gadgets and real time on stretching routines and still skip the thing that actually works. Temperature therapy isn’t new or exciting, but that’s kind of the point. Pressing warmth or cold against an aching joint changes how the body processes pain, and it costs almost nothing.
The warm towel vs frozen peas debate is an important one to have. Each temperature has a specific job when it comes to arthritis stiffness, and using the wrong one at the wrong time can backfire. Heat or cold therapy won’t cure anything, but knowing which one to grab, and why, is often what turns a rough morning into a manageable one.
The benefits of heat therapy for arthritis
Heat is incredibly comforting; it feels just like wrapping a thick, warm blanket around a tired, overworked body. The actual process beneath the surface of the skin is fascinating. When someone applies a heating pad for arthritis pain, the warmth immediately gets to work on the blood vessels. It opens them up wide. This sudden rush of fresh blood brings oxygen and vital nutrients straight to the aching area. It also thins out the fluid inside the joints. Arthritic joints get stiff specifically because the fluid becomes thick and sluggish overnight. Heat gets it moving again. It practically melts the stiffness away.
If you want to understand how arthritis heating pads help, the best way to answer that is by looking at how heat physically improves circulation. It relaxes the muscles that constantly tense up around a hurting joint. When a joint hurts, the muscles around it try to guard it by tightening up. Heat tells those muscles to finally let go and relax.
There are a few different ways to deliver this soothing warmth. An electric heating pad for arthritis is incredibly popular because it provides a steady, controllable stream of warmth. You simply plug it in, set the perfect temperature, and let it do its job while sitting on the couch reading a book.
On the flip side, some people completely swear by moist heat therapy for arthritis. Moisture actually conducts heat through the skin and deep into the tissue much faster than dry air ever could. A damp, warm towel or a specialized moist heat pack can feel like a godsend for deep, nagging aches that refuse to fade.
The benefits of cold therapy for arthritis
Now, let’s shift gears completely and look at cold. Cold therapy does the exact opposite of heat. Instead of opening blood vessels up, it tightly constricts them. That sounds a bit alarming at first glance. But it’s really not.
When a joint is actively inflamed, it feels hot to the touch, swollen, and just painful. Sending more blood to that area with a warm pad would actually just make the swelling much worse. That is exactly where cold therapy saves the day. Applying an ice pack for arthritis slows down the heavy blood flow to the inflamed joint. This acts as a highly effective, localized numbing agent. It quickly dulls the sharp nerve pain and visually brings down the puffy swelling.
The true benefits of cold therapy for arthritis shine their brightest after a long, highly active day. Maybe someone spent the entire afternoon gardening, walking around a large grocery store, or playing outside with grandchildren. If a joint flares up after all that wonderful activity and feels tender, cold is definitely the answer. A simple session of cold therapy for arthritis, lasting for about fifteen to twenty minutes, takes the sharp edge off that acute flare-up.
Some people disagree, but cold therapy can actually feel just as incredibly soothing as heat when it is timed perfectly. From a practical standpoint, anyway, it just serves a completely different, but equally important, purpose. It calms the violent storm inside the joint rather than loosening the morning stiffness.
Heat vs ice for arthritis pain: how to choose
Choosing which one to grab from the closet can be tricky. Heat or cold therapy for arthritis usually comes down to timing and paying close attention to the specific type of ache.
Morning stiffness almost always calls for heat. When joints feel entirely locked up after eight long hours of sleep, heat acts exactly like oil for a rusty door hinge. It preps the body for the day’s movement. Using arthritis heating pads right before a workout, a long morning walk, or even just a busy morning in the kitchen is also a fantastic strategy to prevent pain before it even starts.
On the other hand, ice absolutely belongs at the end of the day or directly after a strenuous physical activity. If a joint is actively throbbing, feels warm to the touch, or is visibly swollen, ice therapy is the priority. Heat would be a massive mistake in this specific situation.
Many physical therapists highly suggest alternating the two methods throughout the day. A gentle morning heat session gets the body moving freely, and an evening ice session calms everything right down before getting into bed. It is all about closely listening to what the joint actually needs in that exact moment. If it feels stiff and tight, warm it up. If it feels angry and swollen, cool it down.
Which option fits the moment?
| What the joint feels like | Better choice | Why |
| Stiff, tight, sluggish | Heat | Helps relax muscles and loosen movement |
| Hot, swollen, irritated | Cold | Helps reduce swelling and numb pain |
| Worse after activity | Cold | Gives overworked tissue a break |
| Worse first thing in the morning | Heat | Helps movement feel less stiff |
| Needs gentle daily support | Heat or cold, depending on symptoms | The joint usually decides the answer |
That chart is the simplest version of the decision.
Integrating therapies into a daily routine
Building a new habit takes a little bit of time. But once temperature management becomes part of a daily schedule, it feels completely natural. Keep a warm pad near the favorite reading chair in the living room. Leave an ice pack permanently in the freezer so it is always ready to go when a flare-up happens. Convenience is truly everything here. If the tools are hard to reach, people will not use them.
This is exactly why having dedicated arthritis pain relief supplies readily accessible throughout the house is a brilliant idea. A small pad on the office desk can keep stiff shoulders relaxed during long computer sessions. A larger pad by the bed ensures a warm, soothing start to the day. Small, easy lifestyle tweaks like this add up to massive improvements in daily comfort.
Finding the best heating pad for arthritis
Having reliable tools makes this whole routine so much easier. If you are asking yourself, How do I choose the right heating pad for arthritis? The most important factor is consistent temperature control. A cheap, flimsy pad usually cools off… right when your muscles finally start letting go. And that’s incredibly frustrating. That is exactly why ACG Medical Supply is such a great place to look. We carry heavy-duty arthritis heating pads that actually hold their temperature and provide the consistent warmth or cold your joints crave
Conclusion
Joint stiffness doesn’t have to ruin your day. Warmth in the morning and cold after a long afternoon take no more than a few minutes. Some days are rougher than others; that’s just how it goes. Try both, see what your body responds to, and keep whatever works somewhere you’ll actually reach for it.
Frequently Asked Questions
Heat is generally better for morning stiffness because it relaxes muscles and lubricates the joints.
Apply cold for 15 to 20 minutes at a time to effectively numb the pain without irritating the skin.
Yes, they can be used daily, but always utilize a timer or auto-shutoff feature for safety.
Moist heat often penetrates deeper into the muscles, providing faster and more effective relief.
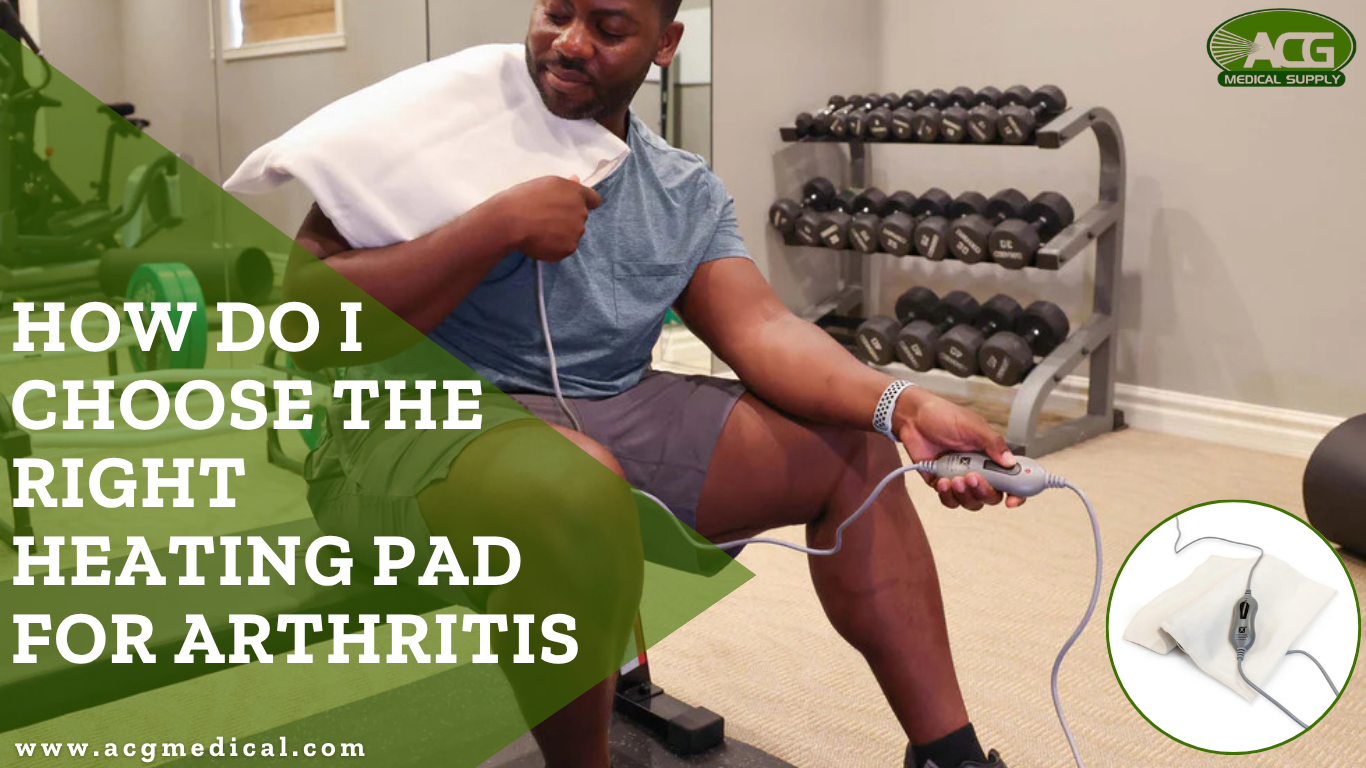
The body moves better when the joints move freely. But Arthritis takes away that freedom little by little. Once Arthritis hits, every small action requires extra effort and patience. It feels as though the joints are stuck in slow motion until they finally warm up and the stiffness is gone. Applying targeted heat helps alter this physical state by thinning the heavy fluid around the bone. However, a flimsy retail arthritis heating pad cannot really hold the steady temperature that’s needed to reach the deep source of the ache in the joint. Real relief from joint pain and stiffness requires a specialized medical device that perfectly fits the shape of the sore area.
This guide covers types of Arthritis heating pads, sizing, features, and portable options that work for people who are out of the house most of the day.
Benefits of heat therapy for arthritis
Arthritic joints stiffen when they sit still. Synovial fluid, the liquid that keeps joints moving without friction, thickens during periods of inactivity. A cold morning after eight hours of sleep is about the worst condition for it. The joint feels locked, slow, and painful to start. Heat reverses that. It thins the synovial fluid, brings blood flow back to the surrounding tissue, and loosens the muscles that tighten up around a sore joint.
The benefits of heat therapy for arthritis show up most clearly in that window before movement begins. A 15 to 20-minute session with a therapeutic heating pad before morning activity changes how that activity feels. The joint moves with less resistance. The first steps are not as sharp. For people in colder climates, applying heat before heading outside is a practical way to keep joints from seizing up when the temperature drops. Before bed, heat can reduce the residual aching that builds up in joints after a full day of use, which often makes sleep easier to come by.
Types of Arthritis heating pads
Electric heating pads for arthritis run on a standard wall outlet and stay at a set temperature for as long as they are plugged in. The heat is consistent, the controls are simple, and most models cut off automatically after a set time… this feature is useful for anyone who tends to doze off mid-session. For the lower back or shoulders, a flat electric pad works well because it covers a wide surface area without needing to be held in place.
A moist heating pad for arthritis works on a pretty straightforward physical principle: moisture conducts heat through tissue faster than dry air does. That difference becomes apparent when the target is a joint rather than a sore muscle. Dry heat warms what it touches. Moist heat keeps going past the skin and into the joint tissue. Some designs pull moisture directly from the air around them, so the pad generates this effect on its own with no preparation needed. Physicians who treat arthritis often recommend moist heat over dry specifically because of how much further the warmth reaches.
An infrared heating pad for arthritis skips the surface entirely. Instead of warming the skin and letting that heat travel inward, infrared uses light wavelengths that pass through the skin and generate heat directly in the tissue underneath. For the hip or knee joints that sit too far below the surface for standard heat to reach effectively, this is crucial. People who have used electric pads for years without enough relief and then switched to infrared often notice the difference within a few sessions. It is a fair amount more expensive than a standard pad, but for deep joint pain that has not responded well to other heat options, it tends to be the best heating pad for arthritis at that level of need.
Portable heating pads are battery-operated, USB-rechargeable, or air-activated disposable packs. They exist for situations where a wall outlet is not available. More on this in the dedicated section below.
Getting heating pad size for arthritis
Size affects how well the therapy actually works. A pad that covers too small an area leaves part of the joint without heat. One that is too large for a small joint is awkward to position and uncomfortable to keep in place. The right heating pad size for arthritis should cover the full joint area without requiring constant readjustment.
| Joint or Body Area | Suitable Pad Size |
| Fingers, hands, wrists | Small, approx. 6″ x 12″, or a contoured wrap design |
| Elbows, feet, ankles | Small to medium, approx. 10″ x 12″ |
| Knees, shoulders | Medium, approx. 12″ x 15″ |
| Lower back, hips, full leg | Large, 14″ x 27″ or bigger |
Essential features of a high-quality heating pad
Beyond heat type and size, there are a few specific features that separate genuinely useful products from ones that cause frustration after a few uses.
1. Adjustable heat settings
With arthritis, pain levels can change throughout the day. So get a heating pad that has multiple heat settings, as that allows users to switch between gentle warmth and stronger heat when needed.
2. Automatic shut-off
This is one of the most useful safety features. Heating pads with automatic shut-off timers reduce the chance of overheating during longer sessions or when you accidentally doze off.
3. Soft fabric covers
Rough or stiff materials can feel uncomfortable against sore joints. Soft covers usually feel better during daily use.
4. Flexible design
Flexible heating pads sit more naturally against the body. This helps the warmth spread evenly across the painful area.
5. Washable covers
Heating pads are used frequently, especially during colder months. Removable washable covers help keep them clean and comfortable.
Portable heating pads for life outside the home
A heating pad for arthritis pain relief is pretty straightforward to use at home. Managing joint pain during a workday, a long drive, or travel is a harder situation, and that is where portable heating pads serve a real purpose.
Three formats that you need to know:
USB or battery-powered wrap pads strap around the knee, wrist, or shoulder. They are rechargeable and provide 45 to 90 minutes of heat depending on the model. These are the most practical portable options for someone dealing with arthritis in a joint during a regular workday.
Microwave gel packs need to be heated before leaving the house, and they can stay warm for 30 to 45 minutes. They are simple, reusable, and inexpensive, and are especially useful for shorter trips or situations where recharging is not convenient.
Air-activated disposable packs need no power source at all. Opening the packaging activates them. Single-use, but very convenient for travel days or situations where neither a microwave nor a charger is available.
Before choosing any portable option, check the heat retention time. A pad that cools within 15 minutes provides no real benefit for arthritis. Arthritic pain and stiffness need sustained warmth over a full session to produce any change in the joint.
Conclusion
Arthritis pain does not behave the same way every day. Some mornings are harder. Some joints need more attention than others. A properly chosen arthritis heating pad, used at the right time and in the right size, works with that reality rather than against it. For anyone who’s managing joint pain daily, the arthritis support products available at ACG Medical Supply are built for exactly that kind of consistent, long-term use.
Frequently Asked Questions
A moist heat electric pad with adjustable settings and a 20 to 30 minute auto-shutoff timer
suits most arthritis needs well.
No. Active swelling needs cold therapy. Heat is for stiffness and chronic aching only.
15 to 20 minutes per session; no longer than 30 minutes without a break.
For deep joints like hips or knees, yes. Infrared penetrates further than surface-level
electric heat.
Search Articles
Popular Categories
Categories
Medical Tips in Your Inbox
Get expert recovery advice, equipment guides, and caregiver tips — delivered weekly. No spam, unsubscribe anytime.

Need equipment today?
Same-day or next-day delivery in the DFW area. Call us now for immediate assistance.
Not Sure What You Need?
Call us and we’ll walk you through the best option for your situation. Our experts help hundreds of families find the right fit every week.